Preparing Hardware/de
<languages />
Um die hier vorgestellten Hosentaschen-WLAN-Router in eine Meteobridge zu verwandeln, muß lediglich das Meteobridge Firmware Image auf diese Geräte geflasht werden. Das Flashen kann meist mit der entsprechenden Funktion der Standard-Web-Oberfläche dieser Router erfolgen. Wenn man eine fremde Firmware auf die Router flasht, verlieren diese die Herstellergewährleistung. Angesichts des geringen Kaufpreises der Geräte keine große Sache, aber man sollte wissen, dass man auf eigenes Risiko handelt.
Flashen der Meteobridge-Firmware auf den TL-MR3020
In der TP-Link Bedienungsanleitung ist beschrieben, wie man eine neue Firmware auf dem Router einspielt. Der Zugriff auf den Router erfolgt über einen Web-Browser mittels eines PCs der via Ethernet-Kabel an den Router angeschlossen ist. Zunächst muss man sich auf dem Router anmelden (voreingestellte IP ist 192.168.0.254, Login-Name ist "admin", Passwort ist "admin"). Wenn man Zugriff zum Web-Oberfläche des TL-MR3020 hat, wird die TP-Link Firmware auf dieselbe Weise überschrieben, wie man ein TP-Link Firmware-Update einspielt. Dabei ist die folgende Firmware zu verwenden meteobridge-tl-mr3020-v1.4.bin und abzuwarten, bis der Router neu startet. Nach dem Neustart befindet sich der Meteobridge-Client in der Standardkonfiguration, in der IP und Netzwerkparameter via DHCP aus dem LAN bezogen werden.
Flashen der Meteobridge-Firmware auf den TL-MR3040 (Version 2.x)
Dies Firmware-Image ist nur für die 2.x Version dieses Routers anwendbar. Man erkennt die 2.x Versionen daran, dass sie einen seitlichen 3G/WSP/AP Schiebeschalter haben. In der TP-Link Bedienungsanleitung ist beschrieben, wie man eine neue Firmware auf dem Router einspielt. Der Zugriff auf den Router erfolgt über einen Web-Browser mittels eines PCs der via Ethernet-Kabel an den Router angeschlossen ist. Zunächst muss man sich auf dem Router anmelden (voreingestellte IP ist 192.168.0.1, Login-Name ist "admin", Passwort ist "admin"). Wenn man Zugriff zum Web-Interface des TL-MR3040 hat, wird die TP-Link Firmware auf dieselbe Weise überschrieben, wie man ein TP-Link Firmware-Update einspielt. Dabei ist die folgende Firmware zu verwenden meteobridge-tl-mr3040v2-v1.4.bin und abzuwarten, bis der Router neu startet. Nach dem Neustart befindet sich der Meteobridge-Client in der Standardkonfiguration, in der er IP und Netzwerkparameter via DHCP aus dem LAN bezieht. Es sei erwähnt, dass der TL-MR3040 während des Boot-Vorgangs kein langsames LED-Blinken zeigt. Die LEDs bleiben dunkel, bis das schnelle Blinken beim Herunterladen der Meteobridge Applikationen aus dem Internet beginnt. Man kann auf der Seite "System Tools -> Firmware Upgrade" des Routers herausfinden, ob es sich um eine Hardware-Version 1.x oder 2.x handelt.
hardware version 2.x

Flashen der Meteobridge-Firmware auf den TL-WR703N (Versionen 1.0 bis 1.6)
Da der TL-WR703N nur mit einer Chinesischen Web-Oberfläche daherkommt, ist es etwas umständlich die richtigen Links und Knöpfe auf der Oberfläche zu finden, um das Firmware-Update einzuspielen. Zunächst muss man sich mit dem Browser einloggen. Dies erfolgt am Besten mit einem per Ethernet-Kabel direkt an den TL-WR703N angeschlossenen PC. Das Web-Interface des Routers ist standardmäßig unter der IP 192.168.1.1 erreichbar, der Login-Name ist "admin", das Passwort ist "admin".
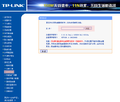
Wenn man Zugriff zum Web-Interface des TL-WR703N hat, muss der Reiter am Ende des Menus auf der linken Seite ausgewählt werden (ist rot markiert auf dem anhängenden Bild). Als Nächstes ist der im Bild (flash screen) hellrot markierte Menupunkt auszuwählen und die zu flashenden Datei über das in der Abbildung rot markierte Dateiauswahlmenu in der Bildschirmmitte zu selektieren. Dabei bitte die folgenden Meteobridge-Firmware verwenden: meteobridge-tl-wr703n-v1.4.bin.
System
Flashing


Finally, a "are you sure" dialog will pop up, please press "yes" button and wait until progress bar has reached 100%. Unit will reboot automatically. After reboot it will be a Meteobridge in standard configuration receiving an IP via DHCP from your router in the LAN.
Flashing Meteobridge Firmware to WL-330N3G (newest version no longer flashable)
As ASUS WL-330N3G cannot be flashed by its stock web interface, it is necessary that you setup a TFTP environment on your Host PC to transfer the flash data via Ethernet to WL-330N3G. Using TFTP is quite simple.
First of all the router needs to toggled into "TFTP update mode". This is done by keeping the button on the top pressed for 5-10 seconds while doing a power cycle. After a couple of seconds the power LED starts a very slow blinking. You can now release the button. Router now waits for being firmware-updated via TFTP.
Sections below describe how to do it for Linux and Windows 7.
Flashing via TFTP on Linux
TFTP update does not need any additional software installed, your Linux already has all you need. Flashing is very straight forward, just execute the script below.#!/bin/sh # if [ "$1" = "" ] then echo "error: flash sys file missing as parameter" exit 1 else echo "power cycle WL-330N3G with button pressed and wait" echo "until power LED does go off and on again. Then " echo "release button and press <RETURN>." read a echo "start flashing..." ifconfig br0:0 192.168.1.20 echo -ne "binary\ntrace\nrexmt 1\nput $1\nquit\n" | tftp 192.168.1.1 echo "...transfer done." echo "Wait until unit does reboot (will take at least 2 minutes). " echo "Do not remove from power during flash process!" fi
The script needs to be called with the flash update file meteobridge-wl-330n3g-v1.2.sys as parameter. Please execute the script as root, otherwise "ifconfig" and "tftp" will not do or will ask for root password. "ifconfig" sets a virtual ethernet adapter with IP 192.168.1.20 on your Linux box, which is the IP the router expects to get the firmware update from.
Flashing via TFTP on Windows 7
First you have to enable the TFTP service of your Windows 7. You can do that by
- Open Control Panel > Programs and Features
- Click "Turn Windows features on or off" on left side menu
- Enable "TFTP Client" then click OK button
Next step is to set the IP of your hosts Ethernet adapter to "192.168.1.20". This will disconnect your Host from your network (as far as your equip is not in the 192.168.1.x class c subnet) but it is necessary to use this distinct IP address in order to make the WL-330N3G to accept the flash data transfer. If you dont know how to set your Ethernet adapter to a static IP, please have a look here.
When TFTP is enabled and IP of your host PC is set to 192.168.1.20 we can start flashing. Please open a CMD shell and type in the command:tftp -i 192.168.1.1 put flash-file-nameHere flash-file-name is the name of the image to flash and you find the correct flash file at meteobridge-wl-330n3g-v1.2.sys. When command is done successfully, number of transferred bytes is displayed.
Final Flashing Tasks
IP of router in update mode is 192.168.1.1, which hopefully will not do a collision with one of your other devices. If there is a collision, switch off the other devices during flash. After data has been transferred via TFTP you have to wait a couple of minutes until flash process inside the router is done and router restarts itself. Restart switches off all LEDs for a short time. Now it is safe to disconnect the router from power. Interrupting the flash processes by a power cycle will brick the router.
Flashing Meteobridge Firmware to DIR-505
D-Link DIR-505 provides a "Router Recovery Mode", but firmware update through this does not work with todays browsers. Therefore, it is recommended to use the firmware update function of the DIR-505's stock firmware. This is done in a few simple steps.
- Download Meteobridge firmware to your Laptop: meteobridge-dir-505-v1.3.bin (or meteobridge-dir-505l-v1.3.bin if you have a DIR-505L)
- Set mode switch of DIR-505 to "Router/AP".
- Power-on DIR-505.
- Wait until LED switches to green.
- Connect your laptop with the WLAN the DIR-505 has setup. SSID and passphrase is on a separate card in the box the DIR-505 came with.
- Start browser on your laptop and direct to "http://192.168.0.1".
- Cancel internet setup dialog provided by stock firmware.
- Enter as user "admin" without password.
- Select "maintenance" tab from the horizontal menu.
- Select "firmware" tab from the vertical menu.
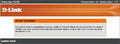
- Select downloaded Meteobridge firmware in "firmware upgrade" section and press upload button (picture on the left).
- DIR-505 checks if firmware is compatible and starts upgrading (picture on the right). When done DIR-505 reboots as a Meteobridge.
firmware upgrade screen
flashing progress

Flash Again
When you need to flash a new Meteobridge firmware to your TL-MR3020, TL-MR3040, TL-WR703N or DIR-505, you can do that by calling the URL "http://ip-of-your-meteobridge/cgi-bin/fwupdate.cgi". This will shutdown some running services and will bring you to the openwrt SW stack below Meteobridge application software stack. If your device cannot load Meteobridge application stack from the Internet for some reason, you can also directly access openwrt web interface by browsing to "http://ip-of-your-meteobridge-device/cgi-bin/luci". Login with your Meteobridge password and go to "System" tab. Select sub tab "Backup / Flash Firmware" and use offered "Flash new firmware" section. Unmark "keep settings" option and start flashing. Keep device connected to power, it will restart automatically. If you have a WL-330N3G, this always needs to be flashed with the TFTP environment as in setup section for that device explained.