Meteobridge VM on VirtualBox
From meteobridge
First step is to download VirtualBox from here. You must be admin or have admin rights when you install VirtualBox, otherwise guest machines might be in readonly mode regarding the disks and will not work properly. After installation of VirtualBox package on your host you can start to setup a Meteobridge VM. You find the Meteobridge VM disk image for VirtualBox in "vdi" format here.
Steps to install the Meteobridge VM in a VirtualBox environment are explained below in terms of an example workflow.
- When you start VirtualBox you are offered to create a new Virtual Machine by pressing the "New" button.
- Enter "Meteobridge" as the VM name, "Other" as OS type and "Other/Unknown (64-bit)" as OS version. Don't select an ISO image as our install will not be done that way. The "Folder" entry tells you where the VM files will be located.
- Copy the downloaded Meteobridge vdi file into the specified folder (with the host OS file copy tools) and press "Next".

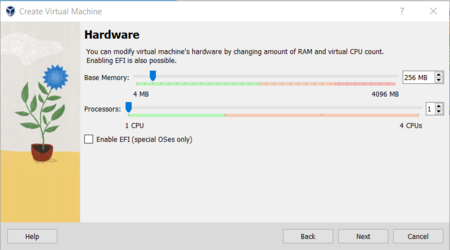
- Now you can select RAM size (256 MB is totally fine, Meteobridge will not benefit from more) and number of processors (also 1 is best option as Meteobridge does not make much use of parallel processing and is not demanding on the CPU side). Press "Next".
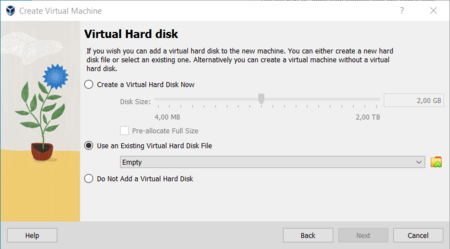
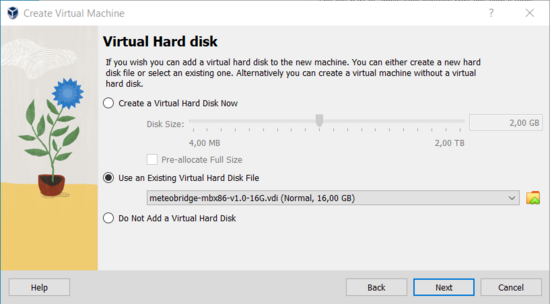
- Select "Use an Existing Virtual Hard Disk File" and click on the folder icon to select the Meteobridge VM disk image.
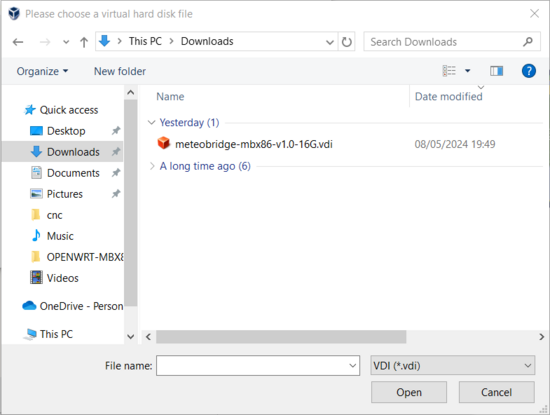
- Press "Add" button to locate your Meteobridge VM disk file. Select the folder where you positioned the vdi file in the previous steps, select the vdi file and press "Open".
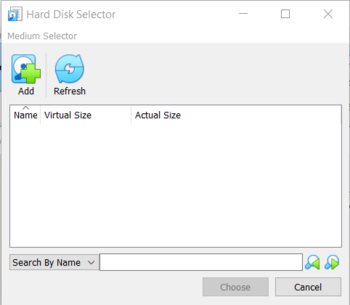
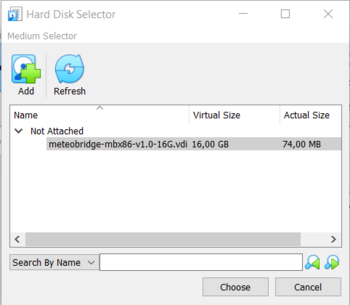
- Now you see the Meteobridge VM disk image in the list of available hard disks.
- Select it and press "Choose" and you will return to the calling menu where the Meteobridge vdi file is now listed as the hard disk to use. Press "Next".
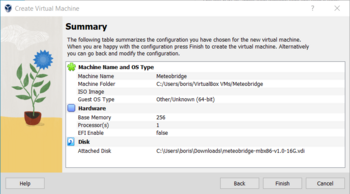
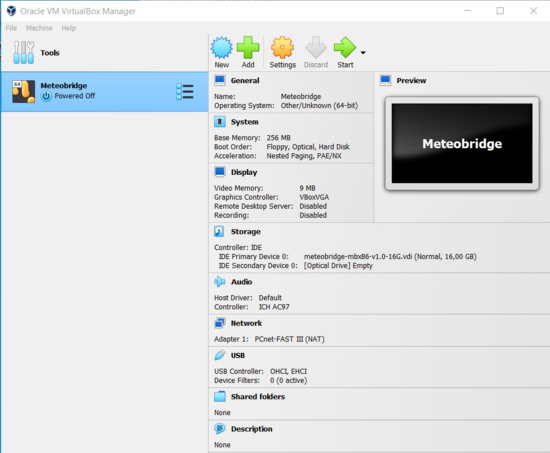
- VirtualBox displays a summary of the Meteobridge VM settings which should look like in the picture below.
- Press "Finish" to complete the initial VM setup. Now it is time to change some details around networking.
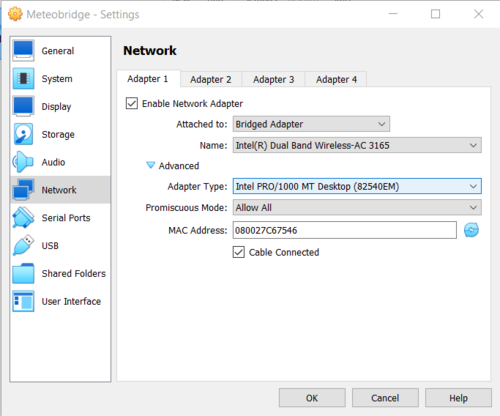
- Press "Settings" button and select "Network" tab.
- Change attached adapter to type "Bridged Adapter". Its name depends on your host's hardware, you don't have to select something there.
- Open "Advanced" menu and select "Intel PRO/1000MT Desktop" as adapter type.
- Allow "Promiscuous Mode" and select "Cable Connected" to simulate a network cable being plugged into the virtual Intel network card. Press "OK".
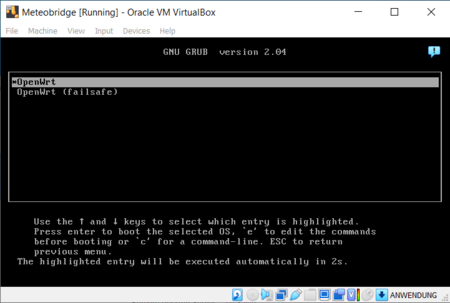
- Back to the VirtualBox VM Manager select Meteobridge VM and press "Start".
- Meteobridge VM will show GRUB start screen and should boot fine as displayed below.
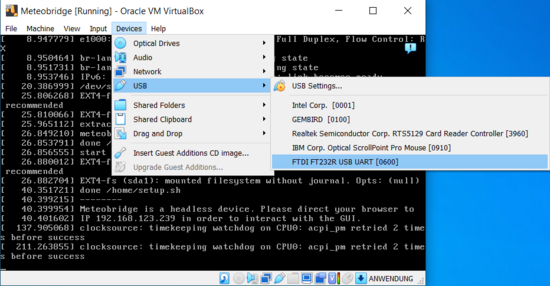
- Last step is to channel the USB port where your weather station is connected to the Meteobridge VM. Click "Devices" drop down menu on the running VM.
- Select "USB" entry and choose the USB device to be passed through from the host to the Meteobridge VM. It is important that you select "USB 3.0" as the other USB modes will make your VM stall when doing USB data transfers. In the example it is a Meteostick which is based on a "FTDI FT232R" USB chipset. Having selected this the Meteostick can be used by the Meteobridge VM.
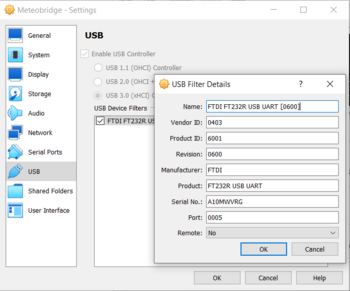
- To make the USB settings permanent select "USB Settings..." and enter this USB device to the list of so called "USB Filter" definitions.
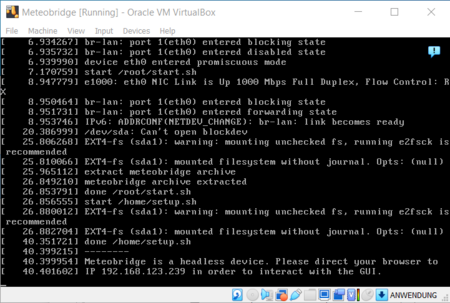
- Now you can direct your browser to the IP shown at the end of the console boot messages to start working with Meteobridge. HTTP default user is "meteobridge" and password is "meteobridge" too.


